Just a few days ago, Samsung unveiled its latest flagship Android Smartphone, Galaxy S4. One of the features that caught everyone’s attention was the S Translator, Galaxy S4’s new language translation app. With the S Translator, one can now speak in any language and have it translated into another language. Samsung Galaxy S4 is already released. But You can also now Install S Translator to Samsung Galaxy S3 or Galaxy Note 2.
How to Install S Translator to Samsung Galaxy S3
Features of the S Translator
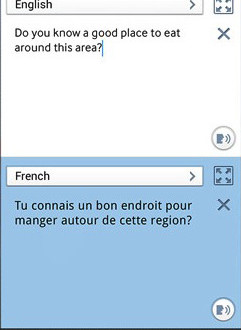
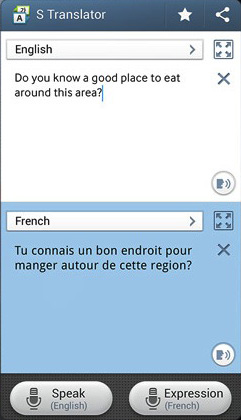
The S Translator will prove to be a very useful app for travelers who can use it for translating languages in real-time while they are in a foreign country. The S Translator app can translate into 10 different languages: US English, UK English, Spanish, Portuguese, Chinese, Japanese, Korean, German, French, and Italian. So don’t wait for Galaxy S4, just bring out your Galaxy S3 or Galaxy Note 2 and follow this tutorial to install the app on your device.
Install S Translator to Samsung Galaxy S3 or Note2:
So now the million-dollar question arises – How to Install the New S Translator in Galaxy S3 or Note 2. Well it is very simple, just follow these steps:
- Download the zip file for the S Translator app from the internet. Also while you are still on the internet, look for some type of custom recovery softwares like TWRP (Team Win Recovery Project) or CWM (Clock Work Mod) Recovery. If you find one of them, download it.
- Root the Galaxy S3 or Galaxy Note 2. How to root? Well, switch off your phone. Reboot it into recovery mode by simultaneously holding the volume, power and home button. Check whether your device has Touch Wiz-based ROM. Wipe the Cache Memory of the ROM. But before wiping please keep a backup of ROM contents. In case anything goes wrong, you can go back to the original state using this backup.
- Install the zip file while you are in recovery mode. On completion, a message will appear “Installation Complete. Enjoy S Translator”. Switch off the device and start it over normally.
- Go to the menu, you will see the S Translator app icon there. On opening it, you will be asked to sign into your Samsung Account. If you have an account, sign in. If not, then sign up for a new account. After signing you can enjoy the S Translator.
So, that’s basically how one can simply Install S Translator to Samsung Galaxy S3 or Galaxy Note 2.


Can i also install it on the s3 mini ?